Setting Up a Personal Website With GitHub Pages
Get yourself out there with your own portfolio site.
Jul 25, 2020 Photo by Carl Heyerdahl on Unsplash
So, you’re starting to think about applying for internships, graduate schemes or your first job in tech. You might even be thinking about starting off as a freelancer. If that’s the case, this is the perfect time for you to be thinking about employability and getting yourself out there to begin your job hunt / freelance journey.
In this post, I’m going to be talking about why you should have a personal website, and how to set it up (for free) using Github Pages.
Why Bother With a Personal Website?
Why should you even bother to create a portfolio site? You have a CV, why would you need anything more?
Having an online presence allows you to expand your network outside of your immediate surroundings. For job hunting, this is especially relevant as a personal website can act as a sign-post to get you and your work seen by potential employers. You can use a portfolio site as a platform to show off your talents, and some of the projects you are proud of that you’ve worked on. Use it as a supplement to your CV that provides extra information on your skills and interests.
To give yourself the best possible chance to succeed, you need to set yourself up properly and make yourself visible to potential clients and employers. Having somewhere to present tangible evidence of your skills and experience will be extremely helpful in getting your foot in the door and proving that you are the right person for the job.
Creating a Website / Portfolio and Hosting It On Github Pages
Now that I’ve convinced you to set up a personal website, heres how to do it, and how to host it for free on Github Pages.
Step 1. Create Your Website
To start with, there are two roads you can go down. If you are confident enough, you can design and code your website completely from scratch. This gives you the freedom to create it on your own and shape it to be exactly what you want.
However, if you are less confident in coding, or just want a simple site you can use straight out the box, you can use a pre-made website from somewhere like startbootstrap.com or bootstrapmade.com — These themes are customisable and quick to set up, just open up the file in your code editor of choice and make changes to the template, everything else is done for you.
This part is probably the longest stage in the process, because you can spend an endless amount of time tweaking and changing your website until you are completely happy with it and ready to deploy it. Remember you can always go back and change things later.
Step 2. GitHub
Once you have the code for your website ready, it’s time to get everything set up on GitHub.
Firstly, go to github.com and sign in (or sign up if you don’t already have an account). Then, you need to create a new repository by clicking the little green “new” button on the left hand side next to ‘Repositories’. A code repository or “repo” is an online storage space for code files, and is what we are going to use to store the files for your website. From here, you should see a page that looks something like this.
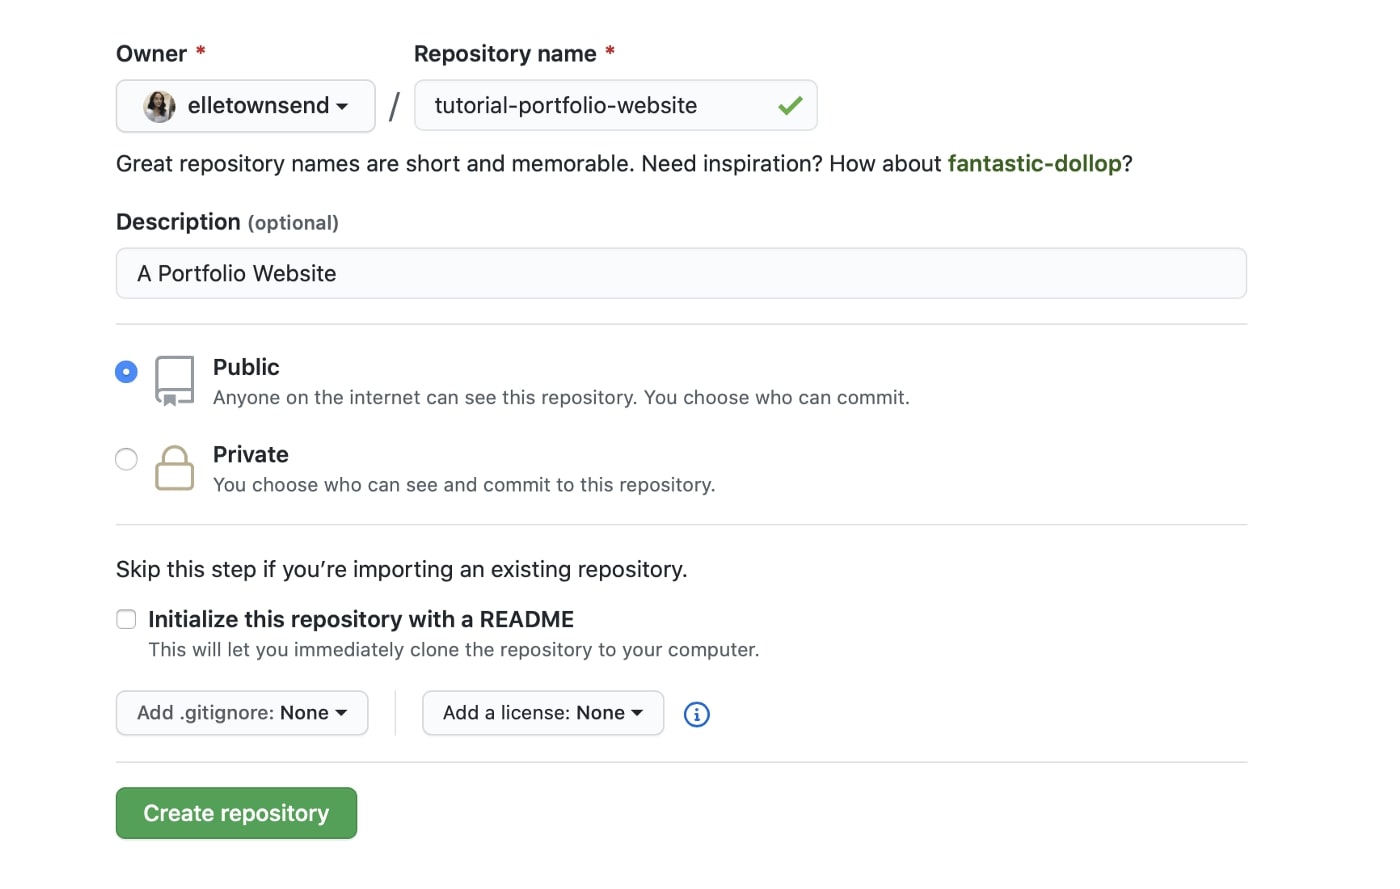
This page is where we give the repo a name (probably something along the lines of your name + “-portfolio-website”), and add a description of what the site is going to be used for. Make it public and click “Create Repository”.
Now we are given some steps to follow to create our new repo and initialise it. This may look a little confusing, so I will go through it step-by-step (keep this page open though as we will be using it in a minute).
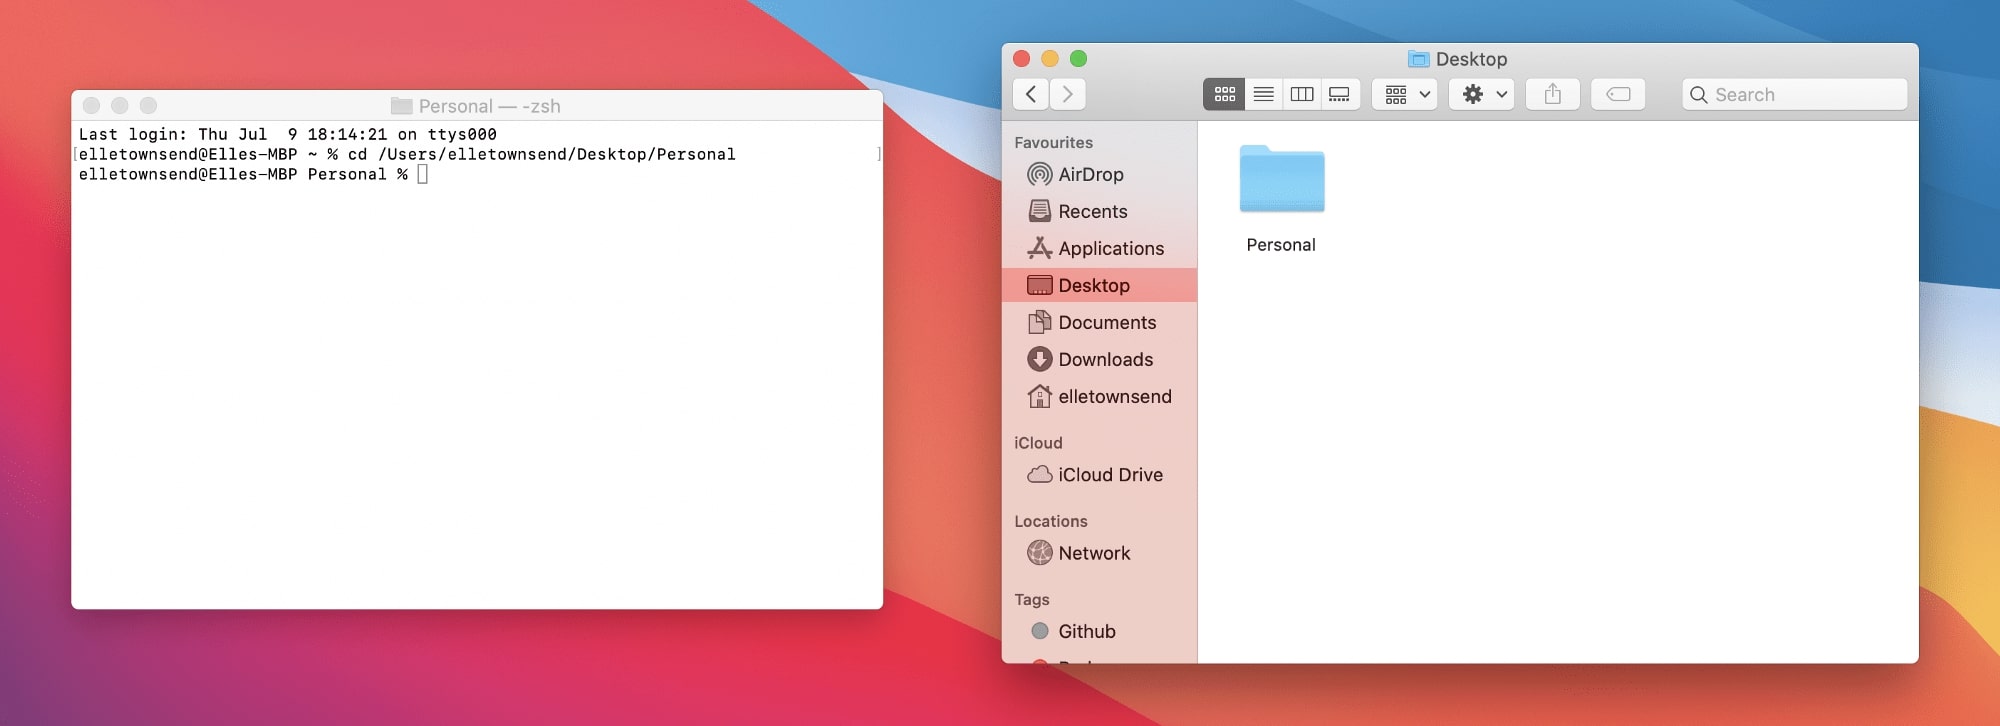
- Open your terminal app — If you’re on Windows, this will be command prompt.

- Type
cdinto the terminal, followed by a space, and then drag-and-drop the folder containing your website’s code into the terminal app (here, I am using the ‘Personal’ theme from bootstrapmade as an example). Then press enter (you need to press enter after each of the following steps). Your terminal should now look something like this (on the left).
-
Now, in your terminal, type
git init -
Next, enter
git add .(this means we want to add all the files of our website to our GitHub repo). -
From here, we will run
git commit -m "Website Created". -
Now, go back to the github.com page and copy this line (yours will have a different URL to mine), and paste it into the terminal and press enter.

- Finally, copy the last line from the GitHub page (
git push -u origin master), this is how we “push” our website’s code to the repo. Give it a few seconds to complete and now you’re 75% of the way to having your website up and running.
Once everything is complete, go back to GitHub and refresh the page. You should see all of your website’s files uploaded. Perfect. Next step — hosting your website on Github Pages!
Step 3. GitHub Pages
Navigate to the settings page (in the tabs at the top) of your GitHub repo and scroll down to the ‘GitHub Pages’ section.

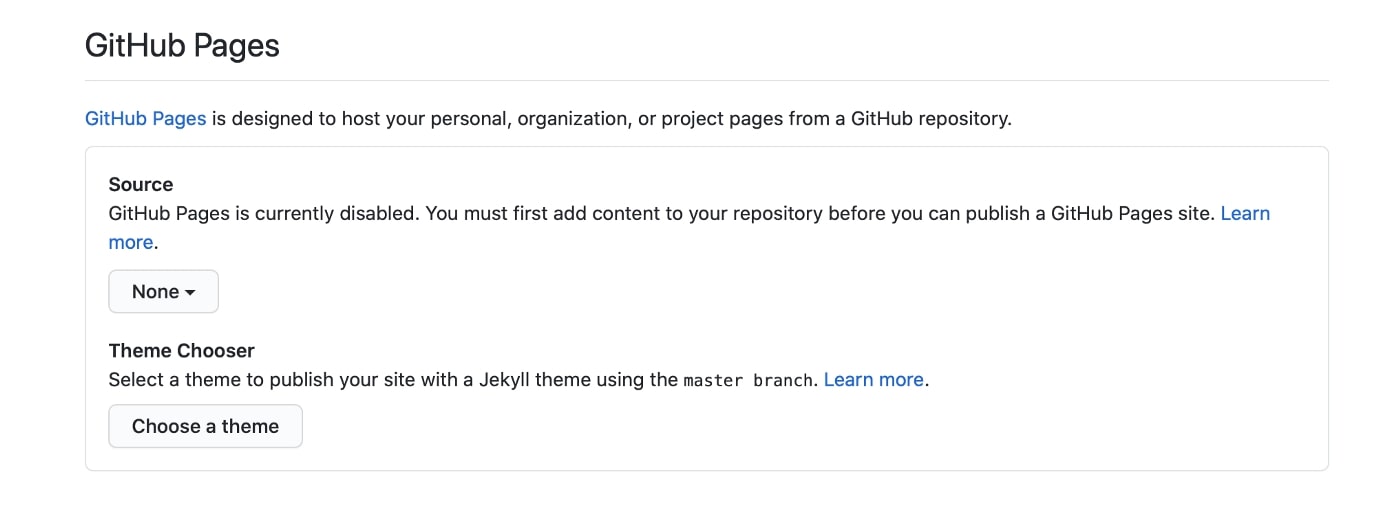
Click on the drop-down menu under ‘Source’, and change it to master branch. Once this is done, scroll back down to the ‘GitHub Pages’ section and it should say ‘Your site is ready to be published at …..’ and if you click on that link, you might see a 404 page! Don’t worry — It might take a few minutes for your website to appear, so check back / refresh the page and hopefully you should see your website! (If it still isn’t working, try adding /index.html to the end of your URL). Now you have a personal website up and running, and you can send that URL link to your friends and family, add it to your LinkedIn / social media profiles or your CV and show off your website! Go you 👏.
Optional Extra
You don’t have to, but if you wanted, you could go even further and add your own custom domain to your new website. You could buy a domain from a provider, and add that to your GitHub Pages site, for example, my website is hosted with Github Pages with my own elletownsend.co.uk domain. To do this for your site, have a look at this guide!
I hope this guide is useful for anyone thinking about getting themselves out there and setting up a personal portfolio website. I know when I created mine, I found the setting up process really confusing and it put me off for a while. I’ve also linked some extra resources out there for this process that I found useful.
Resources
- Getting Started With GitHub Pages — https://guides.github.com/features/pages/
- Creating and Hosting a Personal Site on GitHub — http://jmcglone.com/guides/github-pages/